This post presents a solution to capture a sample of malicious binaries distributed over the Internet.
Post index
Honeypot construction
It has been decided to develop a low interaction honeypot, specifically we have decided to use the honeypot “Dionaea”, which enables the following protocols and simulates their services: blackhole, epmap, ftp,http, memcache, mirror, mqtt, mssql, mysql, pptp, sip, smb, tftp, upnp.
The “Digital Ocean” service has been used to set up this honeypot. We created a virtual machine with Ubuntu operating system, 2GB of RAM, 1 CPU and 50GB of hard disk. 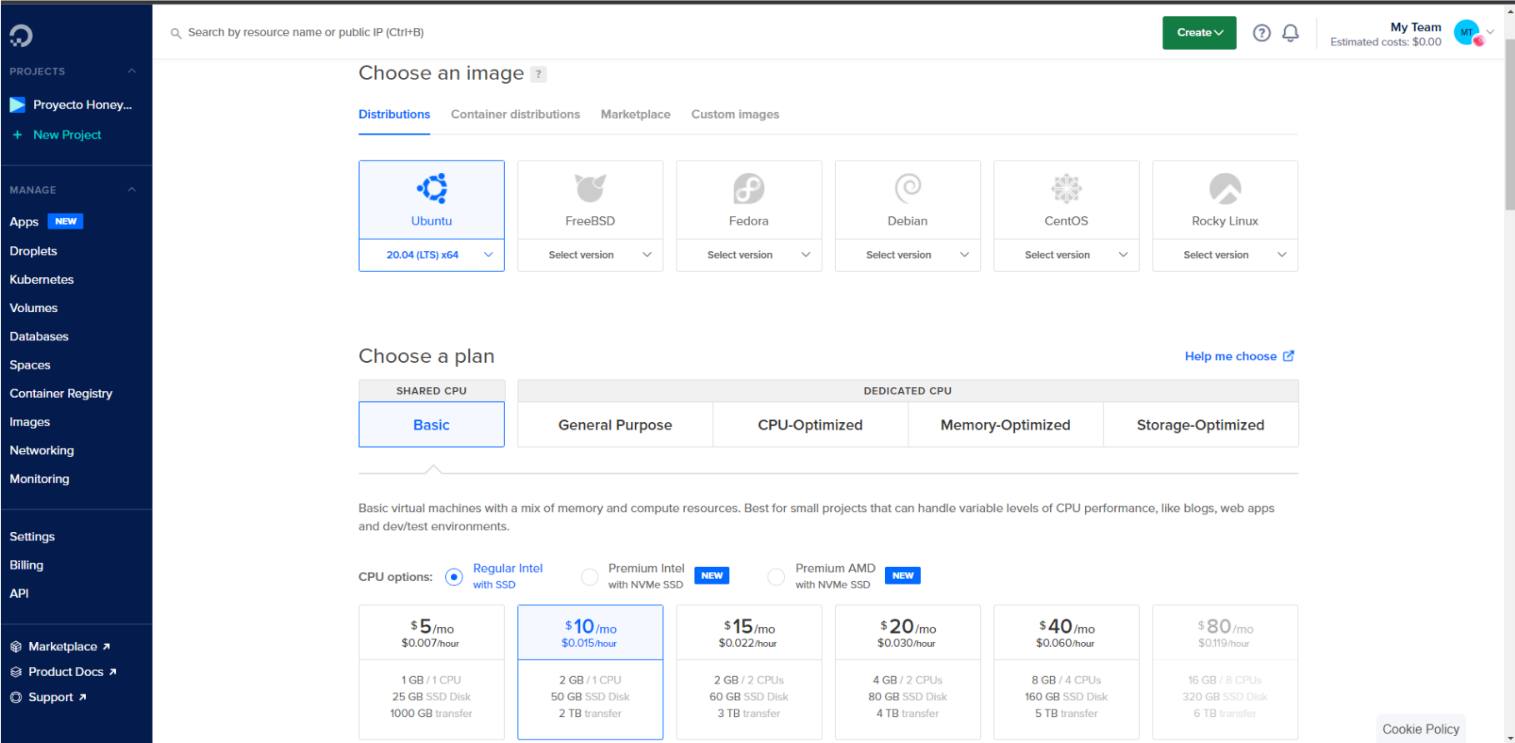 Figure 1 - Digital Ocean.
We enable the connection via SSH connection. We connect to the machine with the credentials. 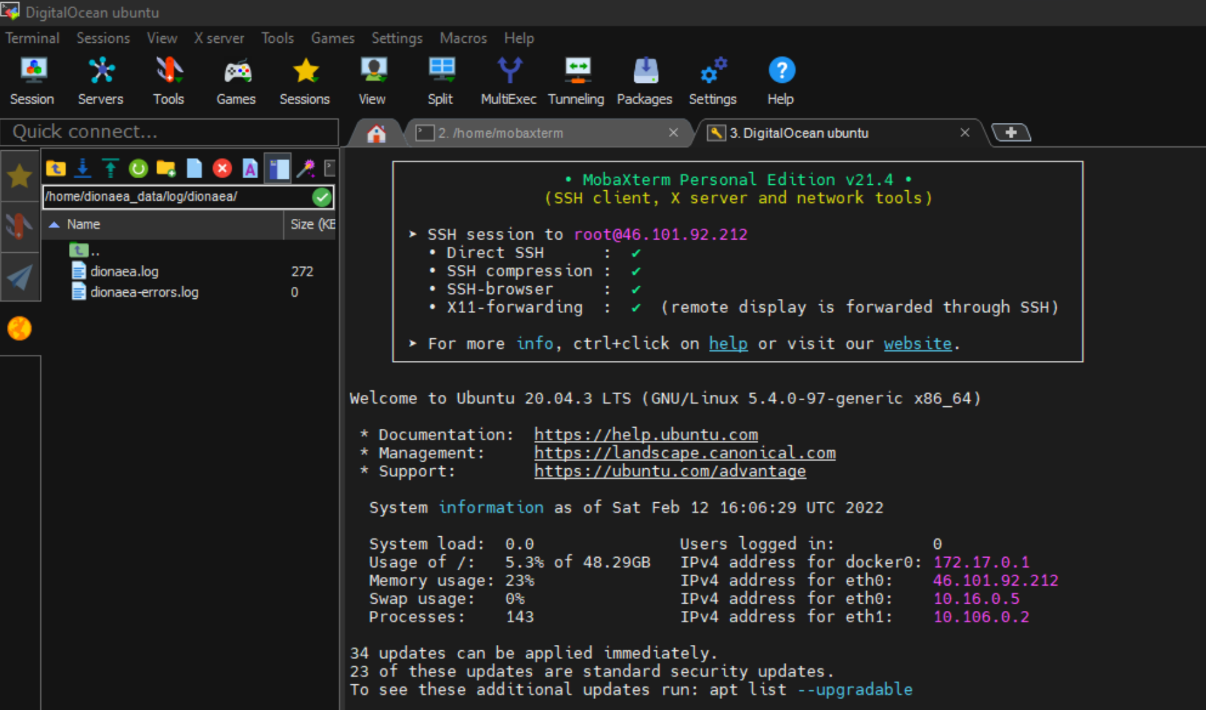 Figure 2 - Digital Ocean connection.
There is an image of the Dionaea honeypot in docker. Before performing these steps it was necessary to install necessary to install packages that the machine needed. We created a container with the Dionaea image. 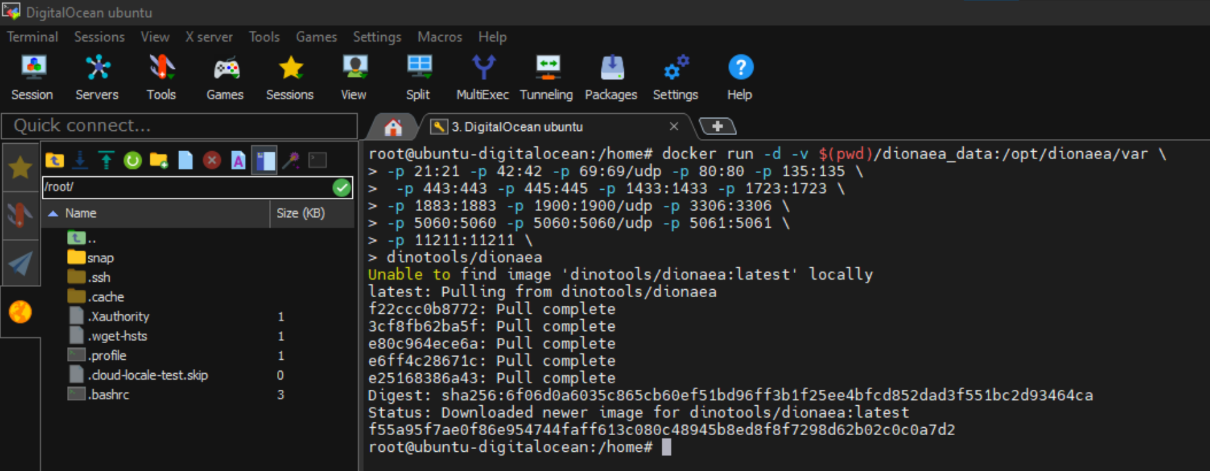 Figure 3 - Dionaea.
To check that everything has been deployed correctly, we can verify this by seeing if the dionaea image has been downloaded to our machine and if there is a container running the image. In this case, we check the ports and services that the container has active. We can also see which ports our machine has active. Here you can also see also the ones opened by the container with the dionaea image. 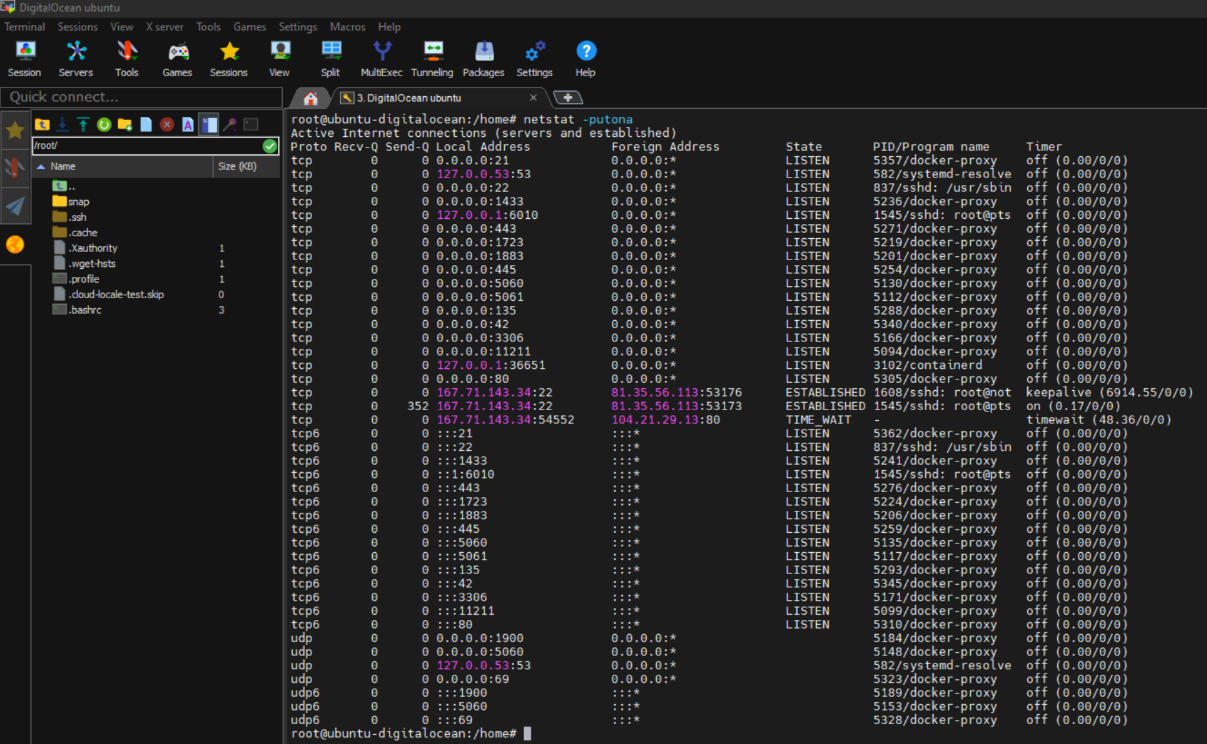 Figure 4 - Dionaea 2.
Once we have checked that the services are up correctly, we are going to see if the folder structure has been created correctly. The folders we are interested in are the ones marked in Figure 5.  Figure 5 - Folders that we are interested.
We left the machine up for a few days to gather information.
Honeypot analysis
We can see how as the hours go by the disk usage of the virtual machine increases. increases its usage. 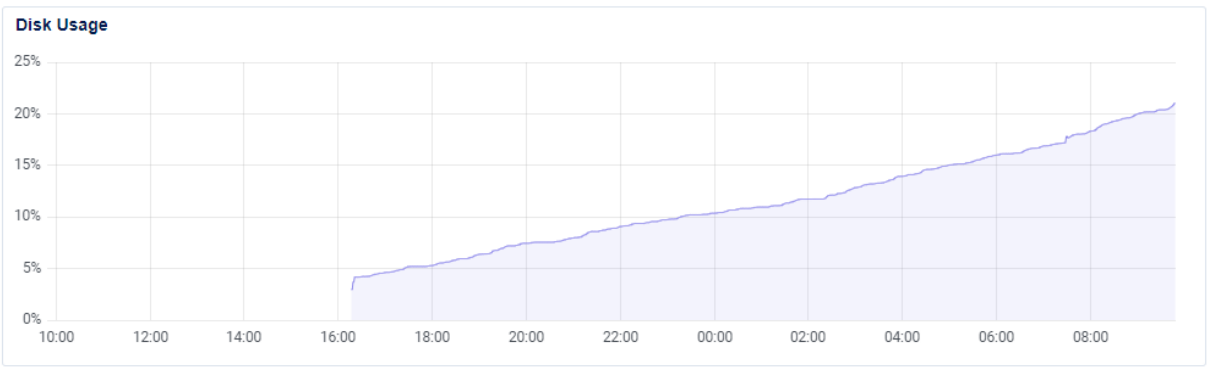 Figure 6 - Disk usage.
The same can be seen on the connections side, we see activity from bots trying to distribute malware. 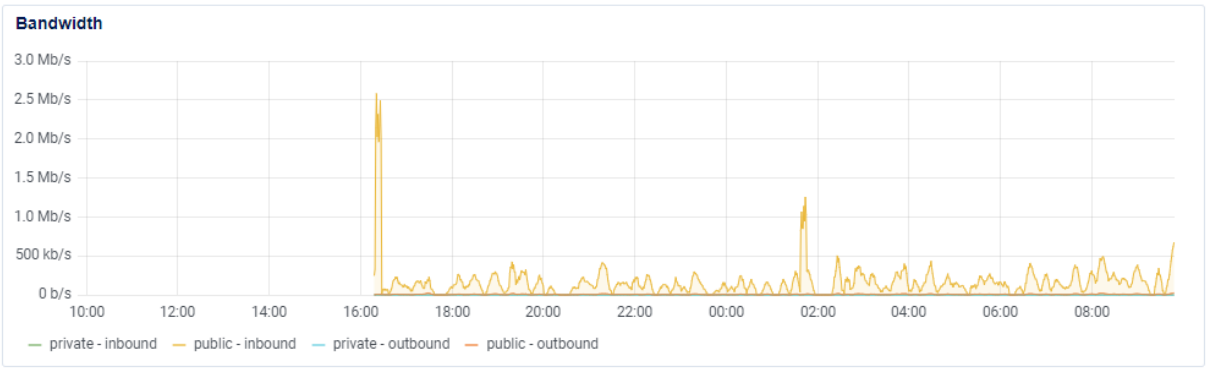 Figure 7 - Bandwidth usage.
After waiting a couple of days, we found all these binaries. 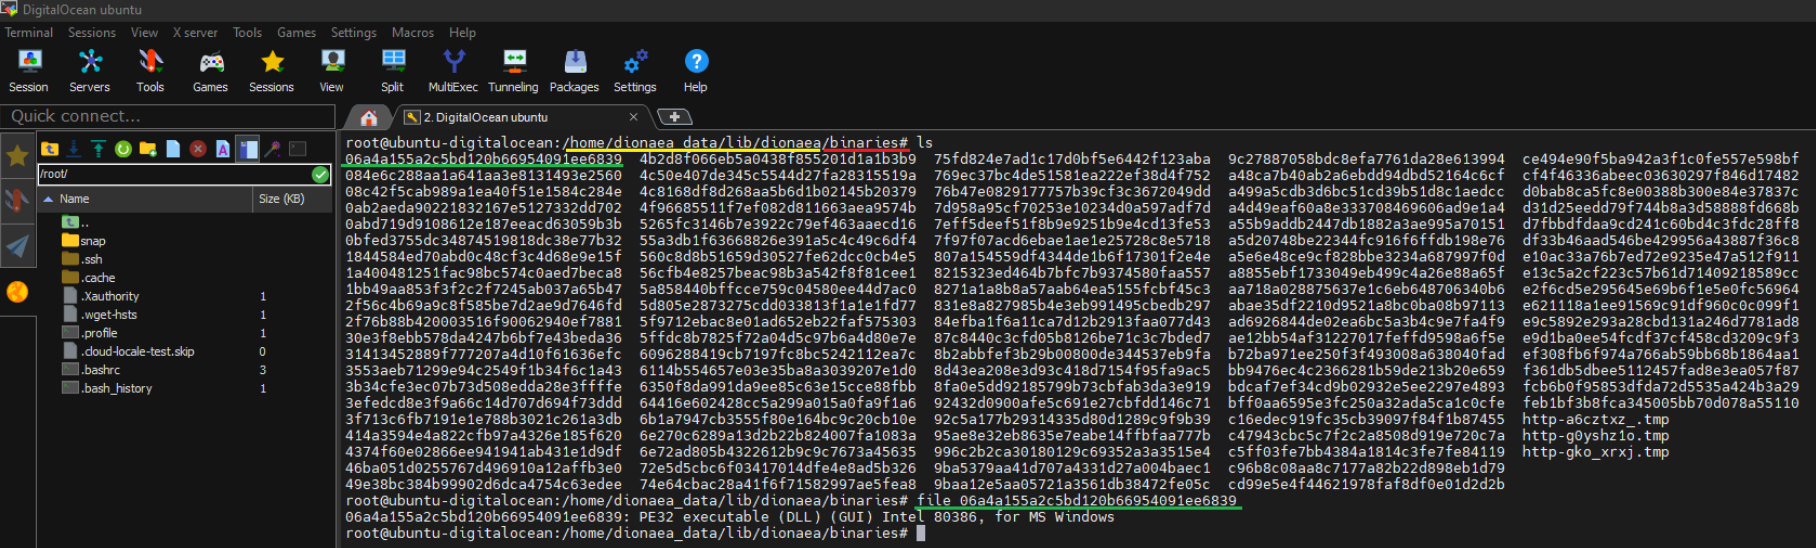 Figure 8 - Binares found.
If we check the file type of all the binaries we have: 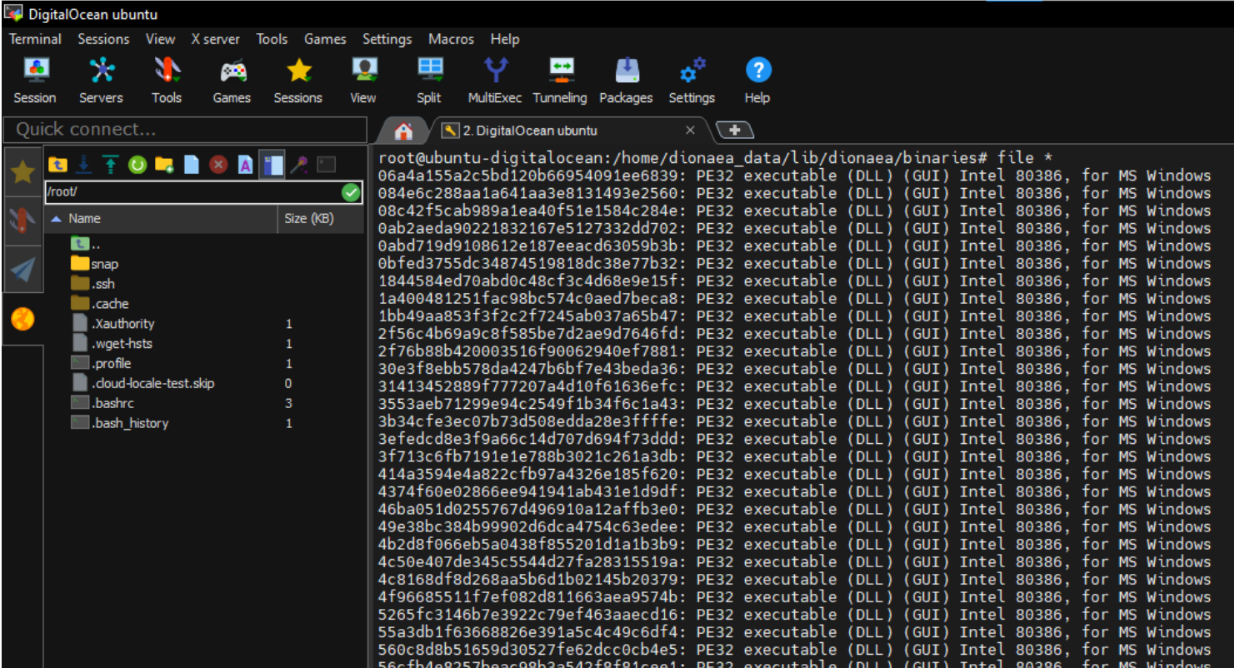 Figure 9 - Type of binares found.
We use ssdeep as a non-cryptographic hash to determine if there are matches between the different files. Marked in yellow and green we can see binaries that appear to be from the same binaries that appear to be from the same family but with small variations in the code. 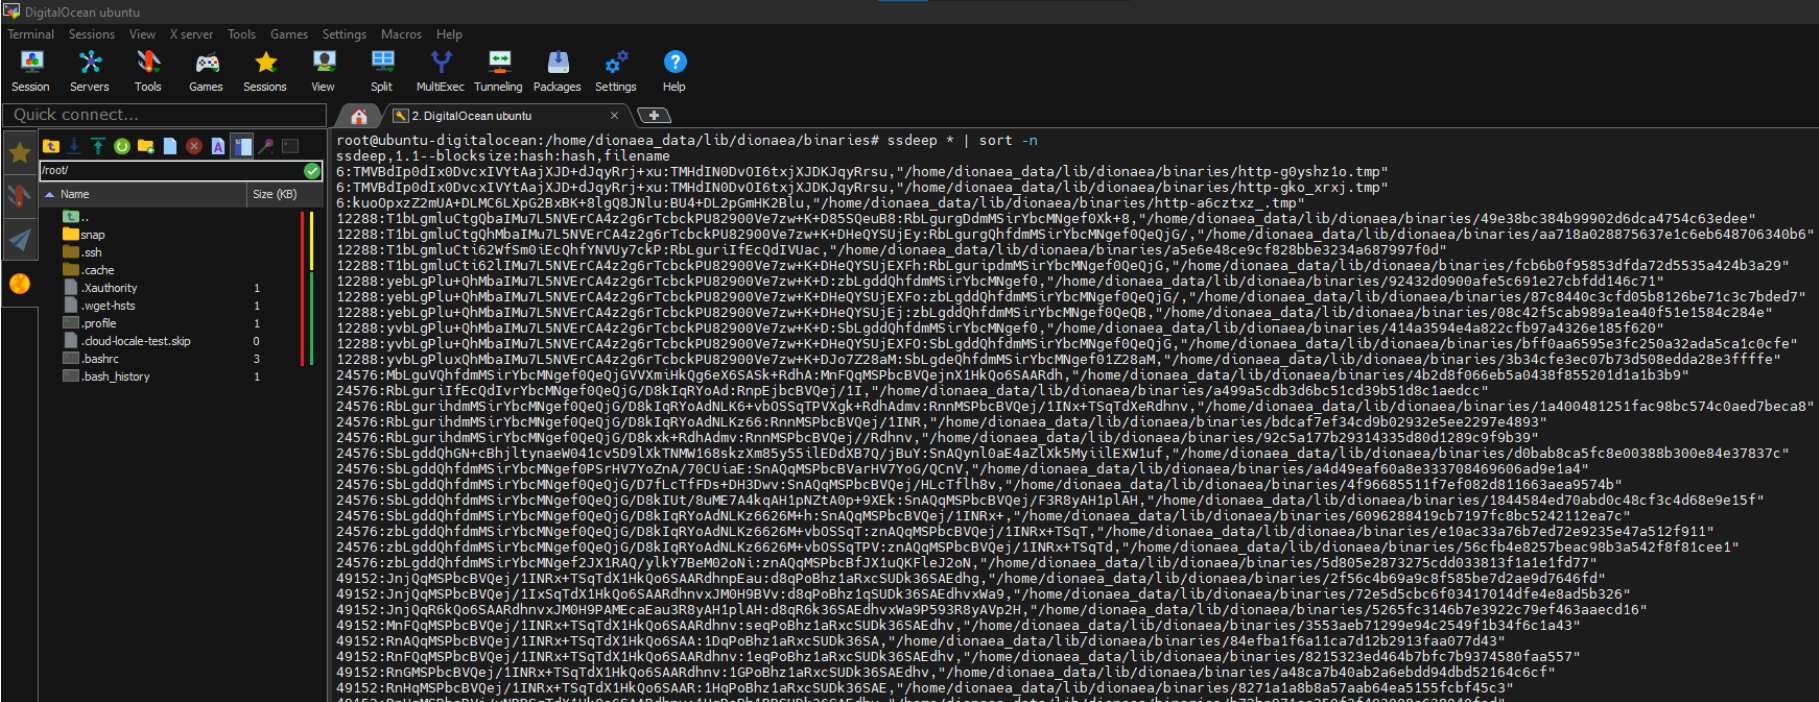 Figure 10 - Using ssdeep to obtain families and variations.
Another additional step to the previous one would be to pass “clamscan” to analyze if these binaries are malicious and to determine which family they belong to.  Figure 11 - Using clamscan to analyze the binaries.
The results of the analysis show that there are a large number of binaries made with the Wannacry Ransomware. 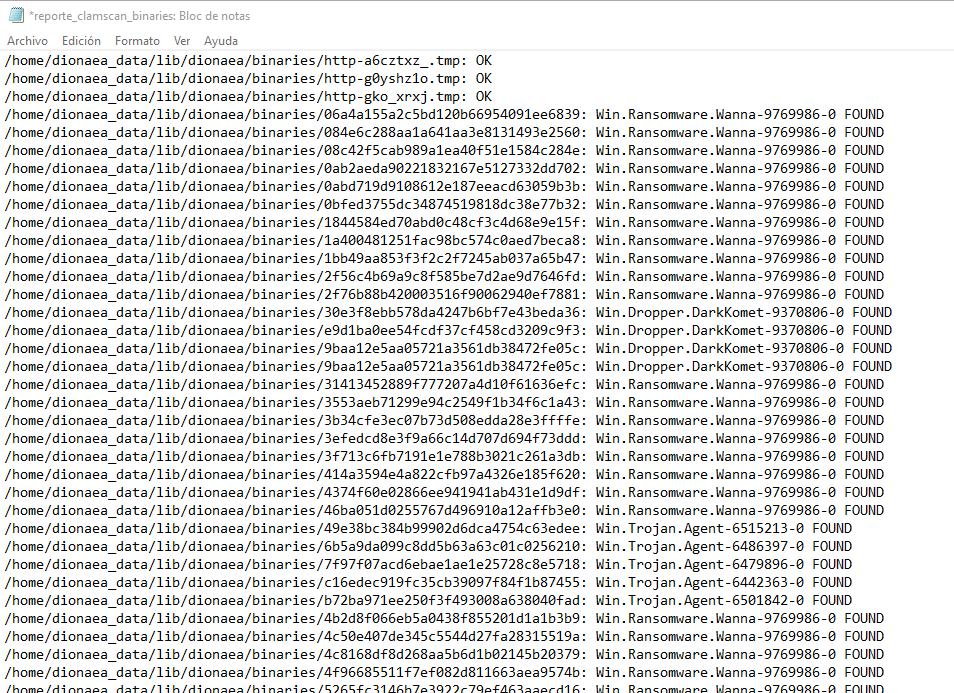 Figure 12 - Family of binaries
After collecting malware binaries, we will proceed to analyze one of them. This will be discussed in future posts.